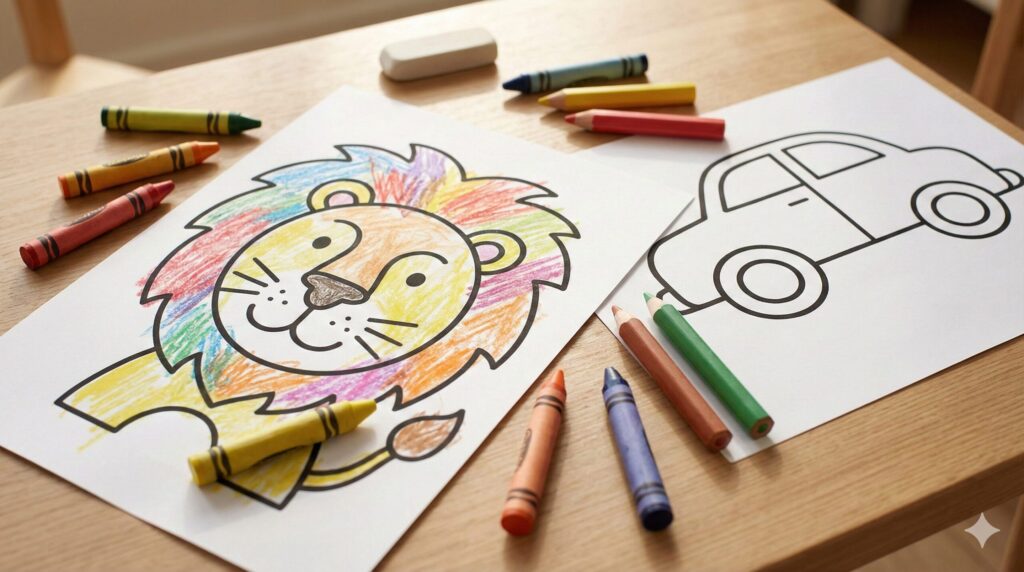
“I colored outside the lines…” “This is too hard…”
These are common struggles for kids ages 3–6, but the cause usually isn’t a lack of motivation—it’s often the line thickness and shape size.
When children are given thin lines and tiny, detailed parts, their hands simply can’t keep up, no matter how hard they try.
In this article, you’ll learn how to choose bold-line, big-shape coloring pages that match early childhood development—plus tips for kid-friendly motifs, and the best home printing settings for stress-free coloring.
And at the end, you can download a free template, so you can create a quick “I did it!” moment today.
Table of Contents (Jump to Any Section)
- Child Development & Line Thickness (Ages 3–6)
- Choosing the Right Motifs: What Makes Kids Ages 3–6 Get Hooked
- Home Printing Settings: The Final Step to Make It Truly Toddler-Friendly
- Free Template Download (Bold Lines & Big Shapes – 1 Page)
- FAQ (Frequently Asked Questions)
Child Development & Line Thickness (Ages 3–6)
Ages 3–6 are a stage where fine motor skills develop from big to small—roughly in this order: shoulders → elbows → wrists → fingertips.
That means detailed coloring that requires precise finger control is often still difficult.
Pressure control is also unstable at this age, so when kids get pages with thin lines or complex shapes, they end up with lots of uncolored gaps and coloring outside the lines. And once that happens, their motivation can drop fast… (sometimes the parents lose patience first 😅).
That’s why I strongly recommend bold outlines (about 1.5–3.0 mm thick) and simple shapes with large areas. When the boundary is clear and easy to see, kids can predict where to color—and that creates more “I can do this!” moments.
Even better, big closed shapes require fewer color changes, so children can reach a sense of completion in about 10 minutes, which makes it much easier to build confidence and keep going.
By Age: Quick Picking Guide (If You’re Not Sure, Start Here)
- Age 3: Bold lines (2.5–3.0 mm) + large open areas / fewer sections (8–12 parts)
- Age 4: Bold lines (2.0–2.5 mm) + mostly curved shapes / sections (10–16 parts)
- Age 5: Slightly bold lines (1.8–2.2 mm) + pages with repeating shapes (windows, stars, etc.)
- Age 6: 1.5–2.0 mm lines are okay / prioritize short time-to-finish over tiny details
Practical Checklist (Follow This and You’ll Rarely Miss)
- Are the outlines bold enough (at least 1.5mm thick)?
- Does the page have around 10–20 coloring areas in total?
- Are the shapes not too sharp or pointy (more curves than corners)?
- Is the background not overly crowded (with white space or large open areas)?
- Does it include large areas like sky, grass, or water that can be colored with similar tones?
The best part about bold-line coloring pages isn’t just that kids can color “better”—
it’s that even if they go outside the lines, the damage feels minimal.
That small detail makes a surprisingly big difference.
As kids build up more “I did it!” moments, they naturally move on to the next step:
thinner lines and more detailed, divided sections.
Choosing the Right Motifs: What Makes Kids Ages 3–6 Get Hooked
The motifs that really click with kids at this age are actually pretty simple—and they usually fall into these three types:
- ①Familiar and easy to name (so they can say things like “Cat!” or “Car!”)
- ②Easy to connect with emotionally (big faces, clear expressions)
- ③Easy to choose colors for (like sky = blue, leaves = green)
The key phrase for making coloring go smoothly is: “big shapes × fewer colors × repeated patterns.”
Once kids can see that they’ll be able to finish it, their focus suddenly kicks in—almost like magic (it’s honestly fascinating).
By Theme: Recommended Design Rules (Quick Reference)
| Motif | Recommended Line Thickness | Suggested Number of Sections | Suggested Number of Colors |
|---|---|---|---|
| Animals (Close-up Face) | 2.0〜3.0mm | 8〜12 | 2–4 colors |
| Animals (Full Body) | 1.8〜2.5mm | 10〜16 | 3–5 colors |
| Vehicles (Front / Side View) | 1.8〜2.5mm | 10〜18 | 3–5 colors |
| Seasons (Flowers / Fruits, etc.) | 1.5〜2.0mm | 10〜15 | 3–6 colors |
Animals: The safest choice is a close-up face design
Young kids naturally focus on faces for a long time.
That’s why animal coloring pages work best when the face is big and the eyes and mouth are clear and easy to recognize.
Round-shaped animals like bears, cats, rabbits, and pandas are especially great choices.
- Line thickness: 2.0–3.0 mm
- Parts: Start with about 4–6 sections, such as the ears, eyes, nose, and cheeks.
- Background: Add a small number of large repeating patterns like hearts, stars, or clouds—
repetition makes coloring easier and helps kids feel successful faster.
The key here isn’t “making them color perfectly.”
It’s designing a page they can actually finish.
Once they finish one page, they’ll often want to do another one right away.
Vehicles: Simplify the silhouette and kids get into it instantly
For kids who love vehicles, a simple front or side view is the best choice.
Limit the design to basic shapes, like this:
- Tires: two big circles
- Windows: 2–3 rectangles
- Lights: two circles
Keeping it to these “core shapes” makes coloring easier and more enjoyable.
- Line thickness: 1.8–2.5 mm
- Shapes: Mostly straight lines + large curves (avoid tiny jagged details)
- Colors: A simple 4-color set works best — body + windows + tires + lights
- Background: Keep it minimal, like one road line + two clouds (too much background can make kids lose interest)
Home Printing Settings: The Final Step to Make It Truly Toddler-Friendly
Sometimes the reason a page feels hard to color isn’t the drawing itself—it’s the print settings.
You know that feeling: “The picture is cute, but it’s weirdly hard to color…”
I’ve fallen into that trap before, and it can be surprisingly frustrating.
- Paper size: A4 is best
- Scaling: Print at 100% (actual size)
(If you shrink it, the difficulty jumps up fast.) - Margins: If possible, choose with margins
(Helps prevent smudging and cut-off edges.) - Line darkness: If the lines look too light, increase the darkness slightly
(But don’t go too dark—heavy lines can get dirty easily.)
The order of tools also matters. If you’re not sure where to start, this works really well:
✅ Crayons → Colored pencils (not the other way around)
Start with crayons to enjoy the simple fun of filling big areas,
then switch to colored pencils to practice coloring closer to the lines.
If you begin with colored pencils first, the challenge level is higher from the start—and kids may get frustrated more easily.
Free Template Download (Bold Lines & Big Shapes – 1 Page)
To make sure this doesn’t end as “just reading,” I prepared a bold-line & big-shape coloring template for preschoolers.
- Download: Save the PDF from the link below (A4 recommended)
- Print: A4 / 100% actual size / margins on recommended
- How to use: One color is enough to start. When it’s done, say “Show me!” and give a big clap—then finish.
(That simple “success moment” is what makes kids want to do the next page!)
Terms of Use: This PDF is for personal use within your household only.
Redistribution, re-uploading, editing for re-sharing, or commercial use is strictly prohibited.
Reposting the content elsewhere is not allowed.
If you’d like to introduce it, please share this article link instead.
This is a 2-page A4 PDF (Bold Lines & Big Shapes Template) that you can print and use right away.
Free Template Download (Bold Lines & Big Shapes – 1 Page)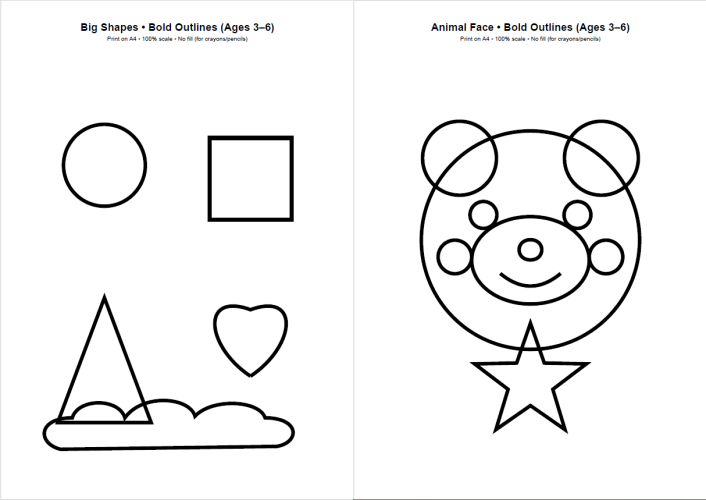
For those who want more
- Etsy(Kids 54p):Want to print more pages right away? → (Coming soon)
- Gumroad (Parent–Child Set): Looking for a bundle you can enjoy together as a family? → (Coming soon)
FAQ (Frequently Asked Questions)
Q1. Which should kids start with—crayons or colored pencils?
A. For ages 3–6, pressure control is often still developing, so it’s best to start with crayons, which are thicker and glide smoothly.
Once they get comfortable filling in large areas, moving on to colored pencils (with finer tips) becomes a much smoother next step.
Q2. I’m worried about coloring outside the lines. What should we do?
A. The number one solution is to choose pages with bold lines and big shapes.
On top of that, these tricks help reduce frustration:
- Color from the outline first, then fill in the inside
- Start with lighter colors to make mistakes less noticeable
If the edges still feel messy, you can gently blend the color with a cotton swab or tissue for a softer finish.
Q3. They get bored quickly. Any tips for staying consistent?
A. The key is to choose coloring pages that can be finished within 10 minutes.
It’s also helpful to set simple weekly themes—like “Animal Week” or “Vehicles Week.”
To make it even easier to keep going, try a visual reward system:
stamp a chart each time they finish a page.
When kids can see their progress, they’re much more likely to stay motivated.