※If you want to return to the pillar article first, click here.:Dream Coloring Journey|A Coloring Guide for Adults & Families
You bought a set of colored pencils, but the colors look “muddy,” the paper starts tearing, or it doesn’t color the way you expected…
Yep—classic beginner problems.
The truth is, what you should worry about first isn’t the number of colors—it’s how well your paper and tools work together.
In this article, I’ll explain the colored pencils, coloring paper, and helpful tools beginners should get—without wasting money—following the actual workflow: base layer → mid layers → finishing touches.
By the time you finish reading, you should be able to start layering smoothly and comfortably—starting today.
Table of Contents (Start Wherever You Like)
- How to Choose Tools and Paper
- Beginner’s Guide: Choosing Colored Pencils (If You’re Unsure, Start Here)
- How to Choose Coloring Paper (This Makes the Biggest Difference)
- These Make Everything Easier: A List of Helpful Tools
- If You Want to Add Crayons or Markers (Order Matters When Mixing)
- Step-by-Step Process (Base Layer → Mid Layers → Finishing Touches)
- Common Mistakes and Fixes (Stop Beginner Problems Here)
- [Free Download] Beginner “Tool Checklist & Color Test Sheet”
- FAQ (Frequently Asked Questions)
- Final Thoughts: Start with Less, and Enjoy Sticking with It
- Back to the pillar article (Benefits of Adult Coloring)
How to Choose Tools and Paper
First, the bottom line: as a beginner, you only need these to start.
- Colored pencils (about 24–36 colors is enough)
- Coloring paper (preferably thicker paper)
- Sharpen / erase / test tools (a sharpener, an eraser, and a test sheet)
This might surprise you, but it’s very common to think, “I bought expensive pencils, but I’m not getting better.”
Most of the time, the reason is one of these: the paper is too weak, the sharpening isn’t right, or you’re pressing too hard.
That’s why it’s important not to get the order of your tools wrong.
Beginner’s Guide: Choosing Colored Pencils (If You’re Unsure, Start Here)
- Number of colors: 24–36 is enough (as long as you have skin tones, shadow colors, and leaf greens, you’re good to go)
- Core hardness: Softer pencils are easier to blend; harder ones are better for tiny details. For beginners, a middle-balanced type is the safest choice.
- Can you buy open stock (single colors)? If you can replace fast-used colors (skin tones, browns, grays), you’ll be able to use the set for a long time.
To give you a rough idea, here’s a simple guide:
- Want to start with the minimum: Around 24 colors (enough to make coloring fun)
- Want to do proper layering: 36–48 colors (more range for shadows = instantly easier)
- Want to dip a toe into the “rabbit hole”: 72+ colors (more fun to choose from—but you’ll want better paper too)
The key isn’t that “more colors automatically make you better.”
It’s that the more you have shadow-making colors (grays, muted tones, and near-complements), the fewer mistakes you’ll make.
Bright colors won’t save you—subtle, “boring” colors will.
How to Choose Coloring Paper (This Makes the Biggest Difference)
For coloring paper, thickness and the surface “tooth” (texture) matter a lot.
- If you mainly use colored pencils:
Thicker paper (approx. 160–200 gsm) + moderate texture
→ Examples: heavyweight drawing paper / sturdy sketchbook paper - If you also use markers:
Very thick paper (approx. 220–250 gsm or more) + you’ll need bleed-through protection
→ Examples: marker paper / thick illustration paper
Even so, alcohol markers can still bleed through easily—so use a backing sheet (scrap paper) underneath. - If you color fine, detailed patterns:
Paper with a smoother surface (less texture)
→ If the tooth is too strong, thin lines can look shaky and uneven, and the coloring may appear streaky.
Using regular copy paper “because it’s what I have at home” is fine for your very first page.
But once you start layering, you’ll hit the limit quickly (it pills, gets patchy, and doesn’t erase well).
A lot of people say, “The moment I switched paper, I felt like my hands got better.” And it’s true.
Note on gsm:
“gsm” is a paper weight/thickness guide. In general, a higher number means thicker and sturdier paper. It’s often used by people who choose paper by performance (e.g., illustrators).
Example: 200 gsm = a 1 m² sheet of paper weighs 200 grams.
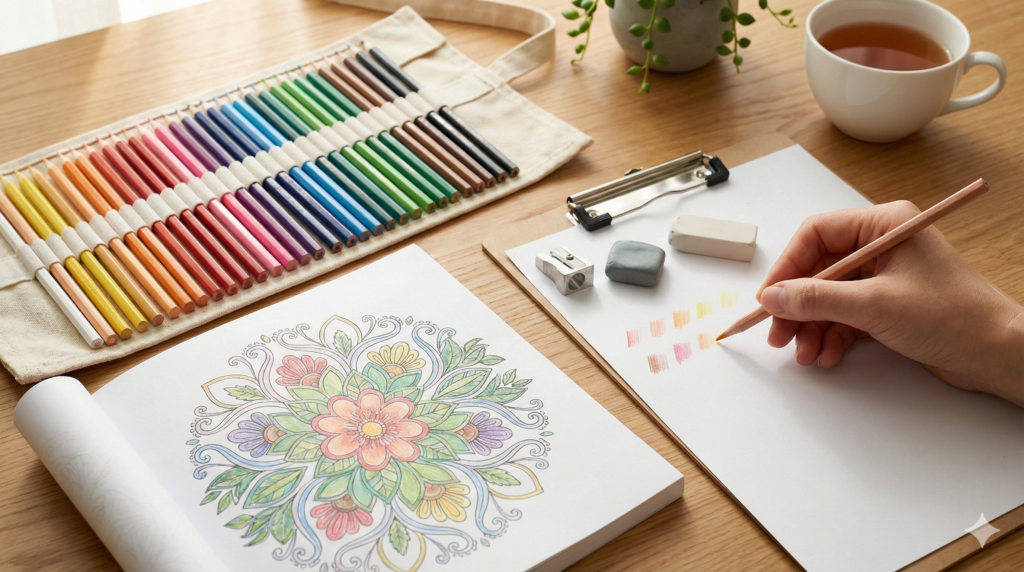
These Make Everything Easier: A List of Helpful Tools
- Sharpener: A type that can expose a longer point makes gradients much easier.
- Kneaded eraser: Great for lifting highlights. Don’t scrub—just dab and lift.
- Firm eraser: Handy for fixing small mistakes near outlines (as long as you don’t damage the paper).
- Scrap/test sheet: Check your colors before you commit. This alone prevents a ton of mistakes.
- Backing board or clipboard: Smooths out desk texture and helps reduce streaks.
- Masking tape: Holds the paper in place—less warping, less stress.
If you have extra budget, these are also helpful for finishing touches:
・White colored pencil (to brighten and add highlights)
・Colorless blender (to soften and blend colors)
If You Want to Add Crayons or Markers (Order Matters When Mixing)
Since it’s in the keywords, it’s worth mentioning: crayons/oil pastels and markers can look amazing when used well—but they also increase the chance of beginner “accidents.”
- Markers: The strongest, most vivid colors. But they can bleed through, feather, and streak easily. Always use a scrap sheet underneath.
- Crayons / pastels (including oil pastel types): Great for filling large areas quickly. However, they can flatten the paper’s texture, so they work best as accents rather than for everything.
Oil pastels can also transfer onto hands and clothing, so if you’re using them with small children, use them in an environment where it’s okay to get messy.
For mixing mediums, the basic rule is “light → dark.”
Layering colored pencils over a solid marker base is possible, but it’s tricky—so beginners should first get comfortable with layering colored pencils before adding markers.
Step-by-Step Process (Base Layer → Mid Layers → Finishing Touches)
From here, let’s talk about the actual coloring process. Choosing tools matters, but this is what makes the biggest difference. Just by not pressing hard, layering suddenly becomes much easier.
Base Layer: Light, Broad Strokes in One Direction
- Goal: Create the first base layer of color on the paper.
- Pressure: About 10–20% of your usual force (tilt the pencil slightly)
- Movement: Small circular motions, or light strokes in the same direction
If you press too hard at this stage, later layers won’t stick well—and you’ll end up thinking, “Why does it look muddy?”
For the base layer, it’s better to think of it as placing color rather than “coloring.”
A great practice before you start is to use a test sheet and try “three light layers.”
Don’t try to finish it in one pass.
Don’t decide in one layer—build it in three.
That’s one of the most important beginner rules.
Mid Layers: Add Shadows and “Grow” the Color
- Goal: Create depth and dimension (shadows and space)
- Colors to use: A main color + a slightly darker version of the same hue + a shadow color (gray / brown / near-complement)
- Tip: Sharpen your pencil often—thin, clean lines make shadows look crisp.
For example, when coloring leaves, don’t try to do everything with “just green.”
If you build a simple step-up like “yellow-green → green → deep green + a tiny bit of brown,” it instantly looks more natural.
Even with a limited set, you can create depth by layering the same color lightly.
If your colors tend to look muddy, you’re probably creating shadows with black.
Black is often too strong, so try gray or dark brown first. Your shadows will look instantly more refined.
Finishing: Set the Contrast and Add the Final Shine
- Goal: Finish the contrast (light vs. dark) and the overall texture.
- What to do: Darken the shadow areas / leave the highlights light (or lift them back out)
- Finishing tricks: Adjust brightness with a white colored pencil, and blend with a colorless blender
A common finishing mistake is using the same pressure everywhere, which makes the whole piece look flat.
In the final stage, press just a little harder only in the darkest areas—that alone will sharpen the entire drawing.
If you want a little sparkle, add one tiny touch of gel pen.
Too much can look cheap, so think of it like jewelry: “one earring only.”
Common Mistakes and Fixes (Stop Beginner Problems Here)
1)Colors Look Muddy
Cause: Pressing too hard / layering too much / mixing too many complementary colors (like red × green)
Fix: Lower the pressure and build color in light passes / use gray for shadows instead of black / test your colors before you start
2)Blotches and Streaks Show Up
Cause: Moving your hand in only one direction / the pencil tip is too sharp / the paper texture is too rough
Fix: Use small circular strokes / tilt the pencil (use the side) / place a backing sheet or clipboard underneath to smooth out desk texture
3)Paper Pills or Scratches
Cause: Scrubbing with an eraser / pressing too hard / paper that’s too thin
Fix: Lift color by dabbing with a kneaded eraser / switch to thicker paper / start with lighter layers from the beginning
4)Markers Bleed Through the Paper
Fix: Always use a scrap sheet underneath / use marker paper / if you’re mainly using colored pencils, don’t force mixed-media layering
5)You Freeze After “I Messed Up…”
Honestly, this is often more of a mental issue than a technical one.
My best recommendation is to make one “practice page” right from the start—your safe place where mistakes are allowed.
When you have a place to “park” mistakes, the real page stops feeling scary.
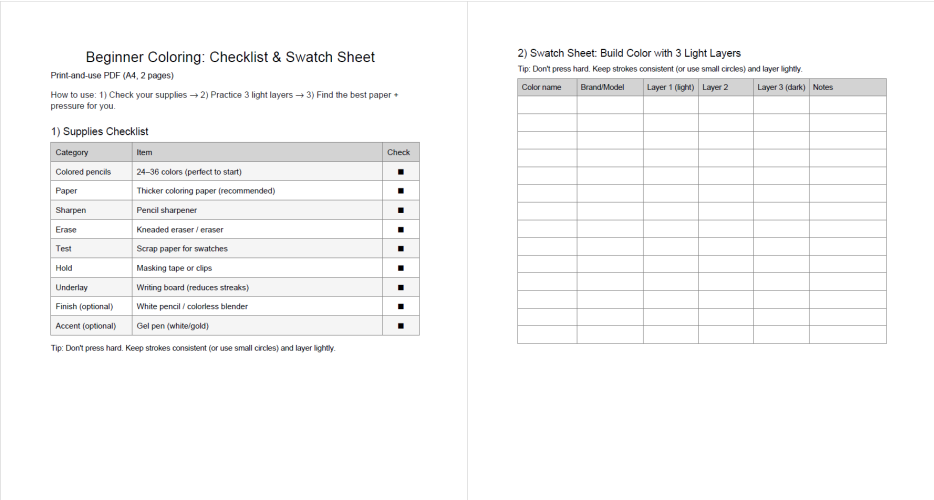
[Free Download] Beginner “Tool Checklist & Color Test Sheet”
- Step 1: Download → Download the Checklist & Color Test Sheet (see below)
- Step 2: Print → A4 recommended (slightly thicker paper if possible)
- Step 3: Use → With your current colored pencils, try the “3 light layers” method and find the paper that works best for you
Terms of use: Printing and use are allowed for personal use only. Redistribution for free, resale, and unauthorized reposting/republication are not permitted. If you’d like to share it, please link to this article.
FAQ (Frequently Asked Questions)
Q1:How many colored pencils should I start with?
24–36 colors are enough. What matters more than the number of colors is whether you have good shadow tones (grays, browns, muted colors). You can also create surprisingly many “missing” colors through layering.
Q2:Can I color with cheap colored pencils (like dollar-store ones)?
Yes, you can. However, cheap pencils may struggle with layering (the core can break down), and they can look streaky depending on the paper. Starting with budget pencils is fine—then moving to a mid-range set once you’re hooked is also a good path. If you upgrade just one thing first, better paper tends to boost satisfaction the most.
Q3:Can I use markers and colored pencils together?
You can combine them, but beginners are more likely to run into problems, so order matters. The basic rule is light → dark. And for markers, bleed-through protection (a scrap sheet underneath) is a must.
Final Thoughts: Start with Less, and Enjoy Sticking with It
Coloring can be exciting when you start buying supplies—but if you buy too much, it can actually become overwhelming. In the beginning, you only need colored pencils, good paper, and a way to erase/fix mistakes. After that, keep your base layers light and build up with multiple passes. That alone can noticeably improve your results.
Back to the pillar article (the big-picture basics):ream Coloring Journey|A Coloring Guide for Adults & Families
Recommended (Print Edition)
・Amazon Recommended Edition: Print version with plenty of finished examples
・Amazon Deluxe Edition: Deluxe version packed with examples & practice pages